Introduction to InDesign
Create a new document in InDesign
After clicking the "New File" button, input the dimensions for the page size you are using. In this example we’re using an A3 (420mm x 297mm). Set your desired number of pages, and crucially deselect the "Facing Pages" option for this type of document, as you want each page to be presented independently rather than as part of a double-page spread. Set your desired margins and your desired bleed (in this case 10mm and 3mm) which ensures no essential elements are cut off during the exporting / printing process.
Customise your InDesign Workspace
Customise your workspace navigating to the menu Window → Workspace → Advanced. It’s good practice to also reset the workspace to ensure a clean slate by navigating to Window → Workspace → Reset advanced workspace . This ensures all tools and panels are set to their default positions, a good foundation to start customising from.
Easily navigate and zoom in InDesign
Depending on your computer, there are several different ways to move around InDesign:
- Trackpad Gestures: For laptop users or those with a trackpad, pinching in or out allows for intuitive zooming and panning.
- Mouse Scroll Wheel: Hold Alt (Windows) or Option (Mac), and then scroll up or down using the scroll wheel on your mouse.
- Keyboard Shortcuts: Ctrl (Windows) or Cmd (Mac) combined with + or - keys will zoom you in or out.
Pressing Ctrl/Cmd + 0 lets you quickly zoom to fit the current page.
Explore the user interface
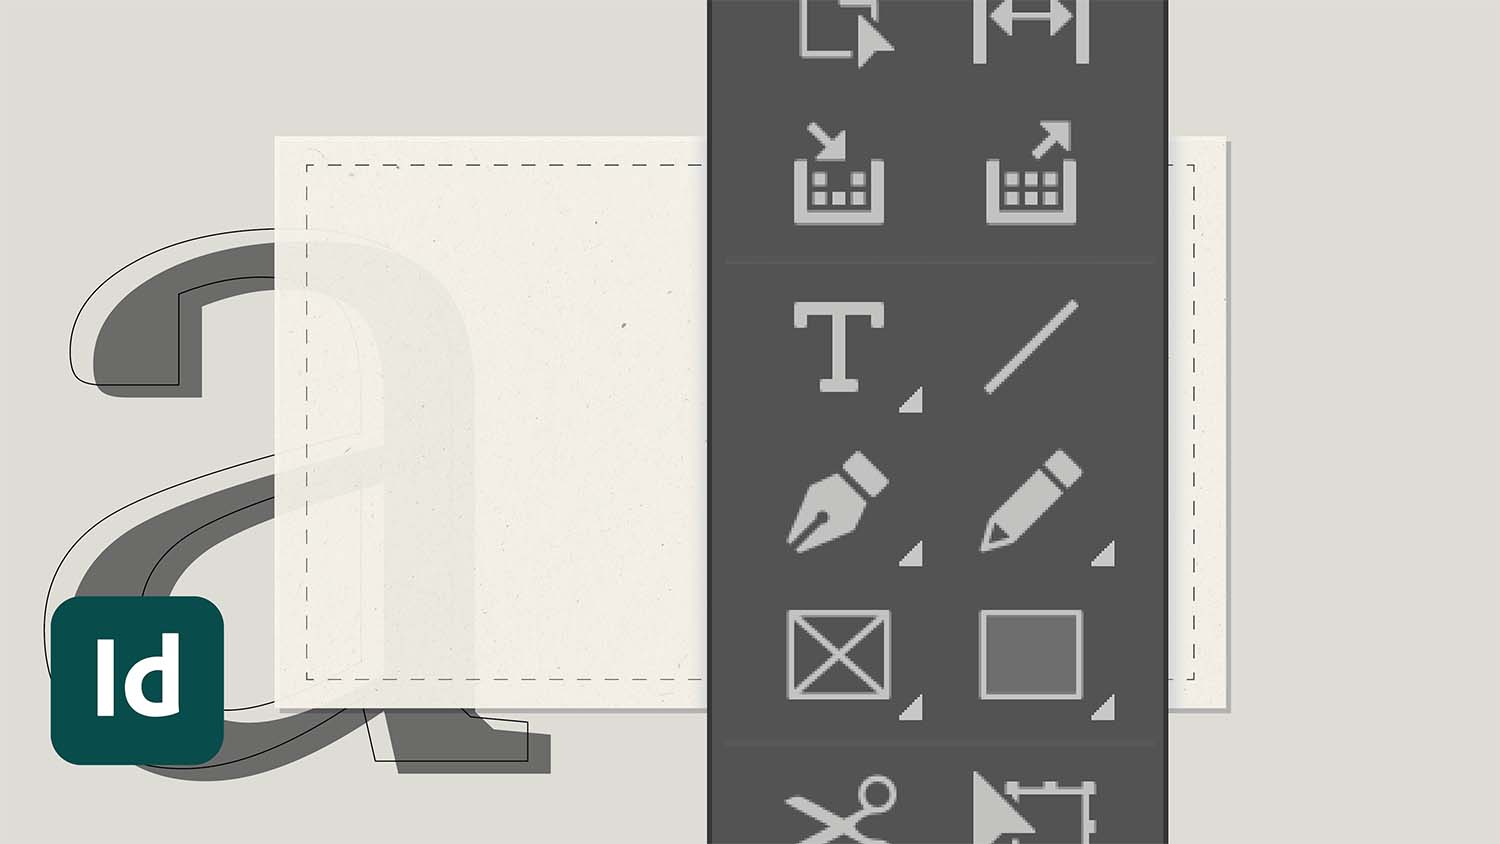
The tool bar — On the left hand side, the Toolbar in InDesign contains a variety of tools essential for creating and manipulating design elements.
The control panel — Across the top of the window, the Control Panel changes contextually based on the current task, offering different options for object manipulation, text formatting, and more, depending on the selected tool or object.
Panels — Along the right hand side are your panels, which contain a wide range of settings and controls, including layers, pages, colour swatches, styles, and much more. You can customise these panels to suit your needs, and can expand, collapse, or pop out panels for easy access while working — tailoring the interface to suit your preferred workflow and screen size.
Customise your panels
You can expand, collapse, and rearrange the panels on the right-hand side of the user interface to suit your needs. You may want to configure these panels depending on how big your screen is, for example.
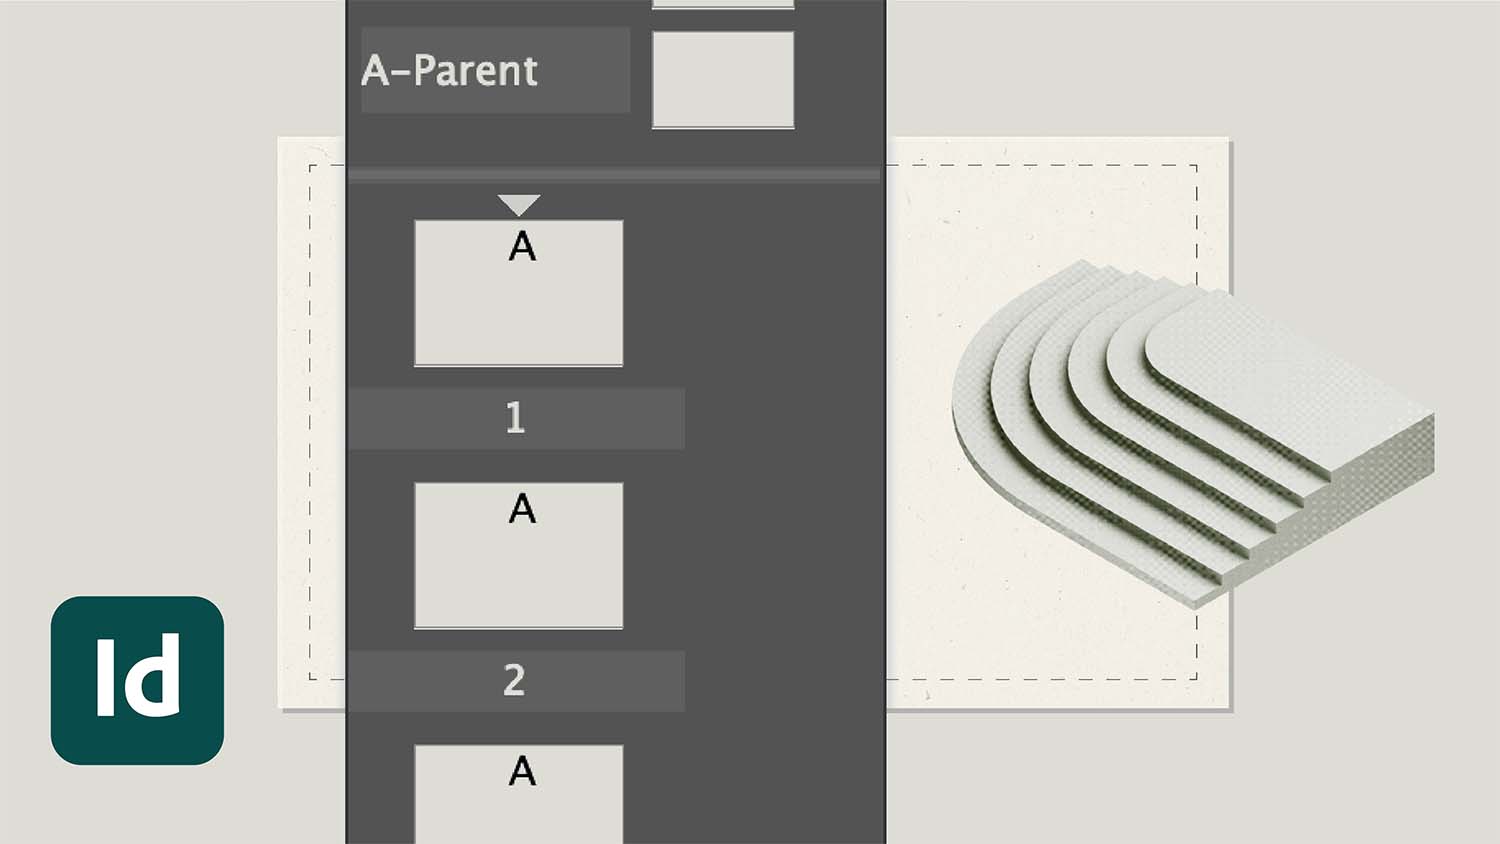
Navigate using the pages panel
The Pages panel is a great tool for managing the structure of your document. It allows you to view thumbnails of all your pages, making it easier to navigate to specific sections or rearrange pages as needed. This feature is particularly useful in larger documents, where keeping track of individual pages can become challenging.