Layout and aligning
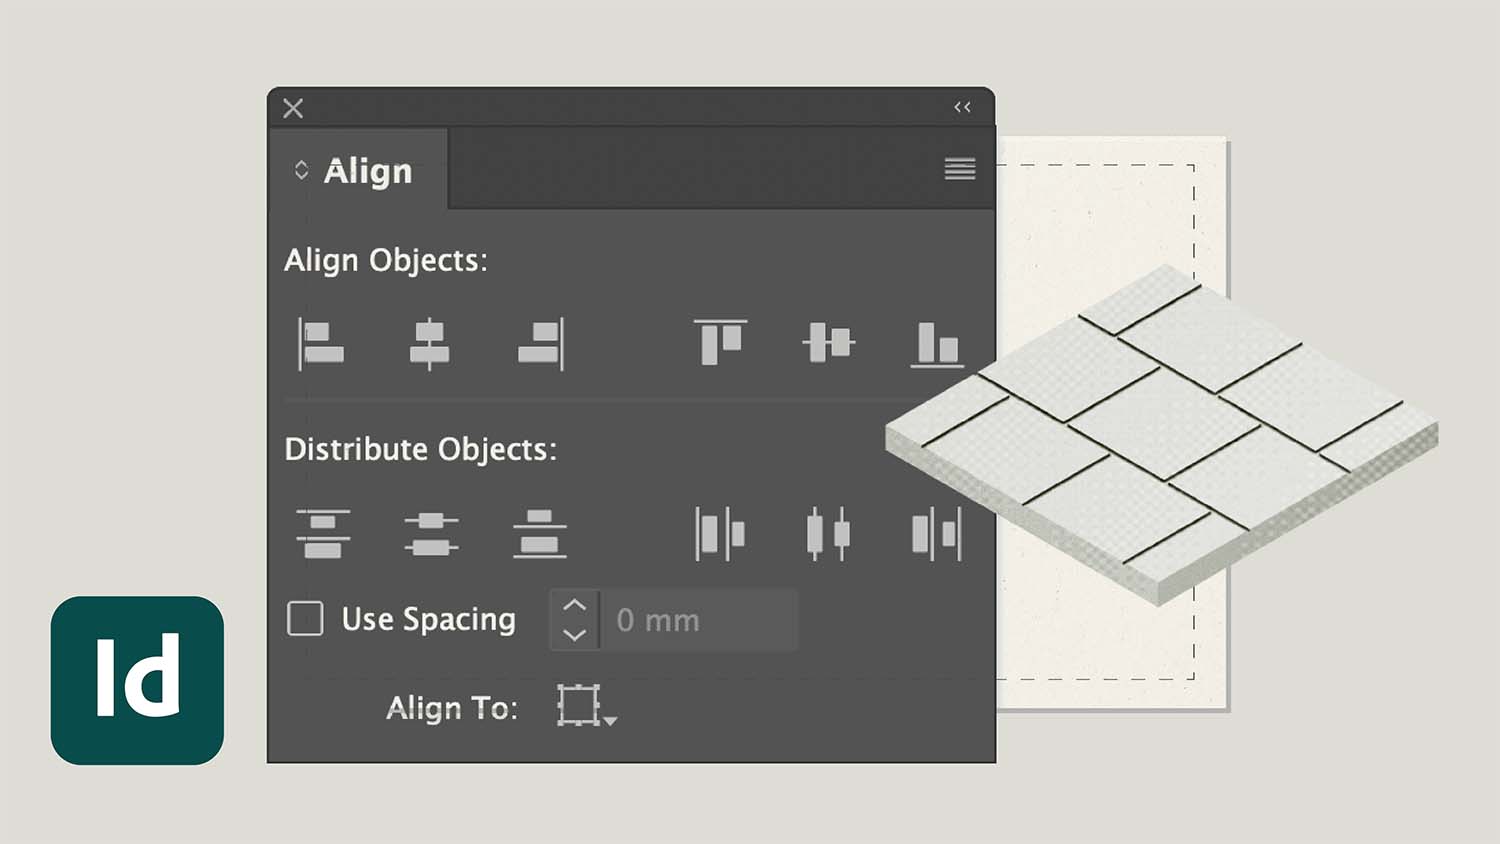
Open the Align panel
To open the Align panel:
- Navigate to the Window menu → Objects & Layout → Align.
- You can also open the Transform panel from the Window menu → Objects & Layout → Transform.
- Dock these two panels on the right-hand side of the user interface.
Select objects to align
To select multiple objects you can either:
- Click and drag a box over all of the objects you wish to select.
- Or hold CTRL on a PC (or CMD ⌘ on a Mac) and click each object individually.
Aligning vertical centres
To align a series of objects by their vertical centres:
- Select the objects you wish to align.
- Click the Align vertical centres button.
Aligning horizontal centres
To align a series of objects by their horizontal centres:
- Select the objects you wish to align.
- Click the Align horizontal centres button.
Specify what to Align To
By default, when you select a group of objects to align, they will align to the Selection, which means the centres of that group of objects. You can change what InDesign will align these objects to if needed:
- Select the Align To drop-down.
- Pick between Selection, Key Object, Margins, Page, and Spread.
- Typically, aligning to Selection or to Margins works for most use cases.
Align to Page or Margins
By aligning to Page or Margins, all objects will be positioned and aligned relative to your whole page. Selecting Align to Page will ignore your margins, and Selecting Align to Margins position objects within your margins.
Align to Key Object
Instead of aligning relative to the entire selection, or to the page or margins, you can select one object to be the reference point for aligning to — this is called a Key Object.
- Select all of the objects you wish to align.
- Once you have selected all objects, single-click on the object you want to be the Key Object.
- This should now have a thicker blue outline.
- You can now use the same alignment tools as before, but the alignments will be relative to the Key Object.
Fully expand your Align panel
If tools appear missing from a panel, ensure the panel is fully expanded:
- Select the panel you wish to use.
- Click on the small arrows at the top left of the panel, next to the panel name.
- Clicking here will expand and condense the panel.
Distribute Spacing between objects
Selecting a Key Object unlocks additional distribution tools. With a key object selected:
- At the bottom of the Align panel, input a distribution length.
- Select either horizontal or vertical distribution options.
- The objects will be distributed relative to the Key Object, using the specified distribution length as a Gutter width.
Specify InDesign keyboard Cursor Key distance
Within the preferences of InDesign, you can set the exact distance to move objects when you use the arrow keys (Cursor Keys) on your keyboard. This allows you to make very specific incremental changes to an object’s position.
- On a PC, open InDesign preferences by going to Edit → Preferences → General.
- On a Mac, open InDesign preferences by going to InDesign → Preferences → General.
- On the left-hand side, navigate to Units & Increments.
- Under Keyboard Increments, specify a Cursor Key distance that is ⅒ of your gutter distance. E.g. If gutter distance is 5mm, then Cursor Key length would be 0.5mm.
- Click OK to accept and save changes.
Move objects using Cursor Keys
Now that you have set a Cursor Key distance that you know, you can move objects by specific, consistent distances.
- Select an object to move.
- Tapping a Cursor Key arrow on your keyboard will move the object by the previously specified distance e.g. 0.5mm.
- Holding Shift + Cursor Key will move the object by 10× the previously specified distance e.g. 5mm.


